When you know about some of the tricks and features of a software that saves you time and effort, it all adds up to make life at work so much easier.
Oracle – NetSuite offers a great deal of customisability for meeting all sorts of business needs, and comes with a wealth of functionalities to help end users such as yourself tackle any day-to-day task with ease.
But this also means that you'll need to know how to use these functionalities effectively and efficiently, in order to draw out the full potential of the true Cloud ERP software.
Thankfully, there are many tips and tricks on the Internet to show you how to get the most out of NetSuite. Here are four tips we’ve curated for you.
1. Use SuiteFlow To Customise And Manage Your Workflows
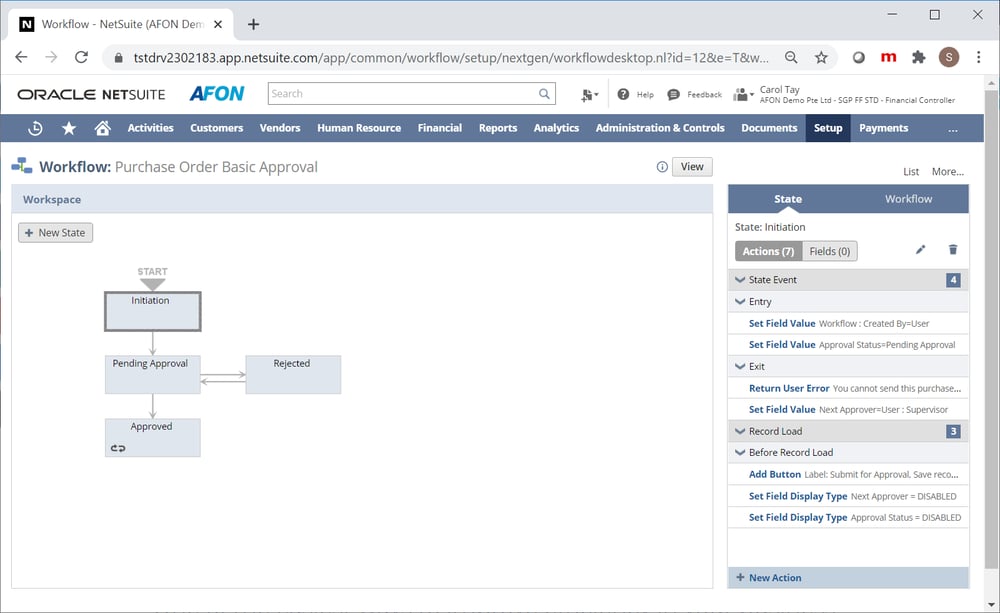
Improve your business process i.e. lead nurturing, PO approvals with SuiteFlow.
One of the easiest ways to improve efficiency in your business processes is to automate them. To that end, NetSuite’s SuiteFlow is a powerful tool that allows you to customise unique workflows to automate your business’s needs.
The workflow management tool provides a point-and-click graphical user interface (GUI) that makes it easy for you to create workflows, without needing to rely on SuiteScript to do so. This means that you don’t have to task your IT personnel with the job of creating business processes; instead, any of your end users can do so easily.
To use SuiteFlow, you should find NetSuite workflows with these steps;
- Go to the Customisation tab
- Go to Scripting
- Find the Workflows option
NetSuite also provides the following three standard workflow templates in SuiteFlow;
- Journal Entry Basic Approval
- Purchase Order Basic Approval
- Sales Order Basic Approval
While these templates can serve as a guide, you should not let them dictate how your business processes should be organised. Instead, take advantage of the customisability that SuiteFlow offers, and use these as a stepping stone towards customising unique workflows that would suit the operations of your business best.
2. Master The Use Of Global Search
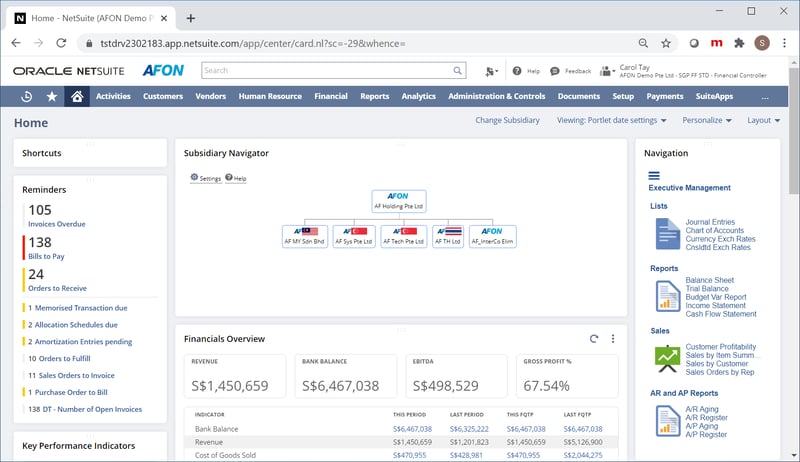
Make better use of the global search bar through the keyboard shortcuts listed below.
NetSuite comes with so many features, tools and dashboards that it can prove daunting for you to pull up a specific page or record when needed. While the Global Search bar at the top of any page can help you navigate NetSuite to find the data you need, here are some keyboard shortcuts that will return more relevant results much more quickly.
- Make use of prefixes to narrow your search to records of a specific type
- Use percentage (%) signs before and after a word (e.g. %word%) to find any records that contains that specific word
- Add a plus (+) sign after a word to include inactive records
- Use underscores (_) to replace any letter in a word (e.g H__ry if you find “Henry” or “Harry)
- Use quotation marks (“”) to get exact text matches in any records
- Use OR to search for multiple criteria (e.g. Henry OR Harry)
- Use a double colon (::) to open a new window displaying your search result.
- Capitalise the first letter of the prefix to return a single result in edit mode instead of view mode
- Use :dash to go directly to a customer’s dashboard (e.g. :dash Customer)
By getting familiar with the use of these keyboards, you’ll be able to use NetSuite much more effectively in your day-to-day work.
3. Take Full Advantage Of Saved Searches
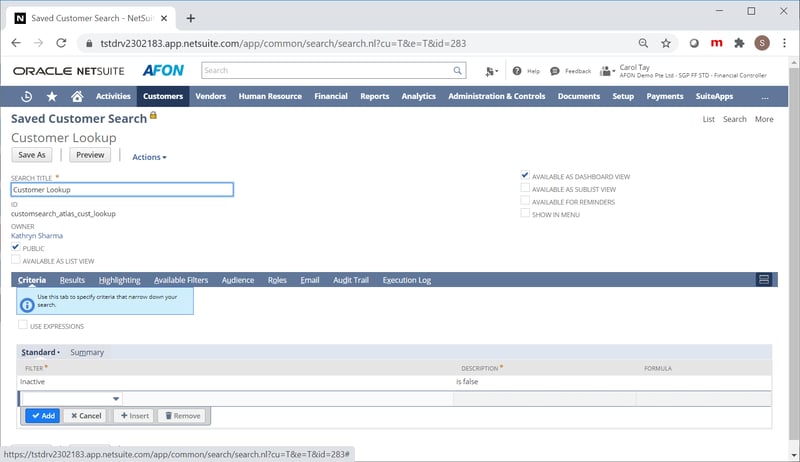
Optimise your Saved Searches.
With all of your business data consolidated into a single database within NetSuite, it’s easy to get overwhelmed by the massive amount of data that’s now at your fingertips.
However, you can quickly find the data you need at any moment with a click of a button, by utilising the Saved Searches feature.
Saved Searches are reusable search definitions that you can use to pull up specific sets of data on a regular basis. Each time you run a Saved Search, it will return the most up-to-date information that’s in the database at any moment.
This makes Saved Searches a powerful feature that helps you access current business data in your organisation in real-time, giving you the visibility you need in your business processes to make informed business decisions that much more quickly.
However, you can use Saved Searches much more effectively than you already do by optimising the way you create them. Here are some ways to optimise your Saved Searches:
- Use the Largest Filters First
To optimise the performance of your Saved Searches and avoid timeouts, list filters that narrow down your search results as much as possible at the top of your filters or criteria.
- Avoid Using ‘Contains’ Condition
It’s one of the most resource-intensive search mechanism, which will only slow down your searches. Trying using alternatives such as ‘Starts With’ or ‘Has’ keywords to further refine the data your search is parsing through instead.
- Remove Extra Columns of Data
The less information you are displaying in your results, the quicker NetSuite will load them. If there are any fields that you don’t need in your results (such as the text-heavy memo field), remove it from your results.
- Schedule Searches That Take A Long Time To Run
If you want to avoid stopping your work in order to wait for a long-running search to complete, you can schedule a Saved Search to run in the background while you work. Once it is complete, the results will be mailed to a list of recipients of your choosing.
- Persisting Search Results for Long-Running Searches
Running searched across a high volume of data can occasionally result in a timeout error. To avoid wasting your time, you can run persisting search results. This lets you run Saved Searches asynchronously for up to three hours, the results of which will be saved in a CSV file.
On top of that, Saved Searches also comes with additional functionalities, which you can exploit to automate and further optimise your business processes. Here are some examples:
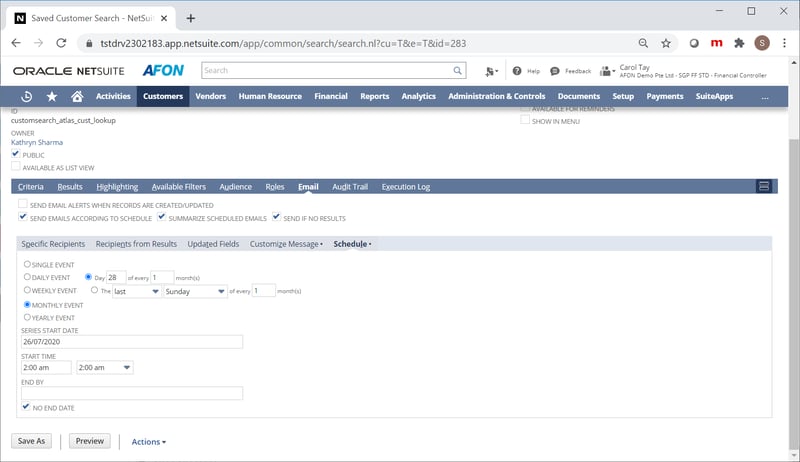
Send automatic email alerts to your customers to notify them about their back-orders.
- Automated Email Alerts
One of the most powerful functionalities available with Saved Searches, you can easily configure the settings of your Saved Searches to automatically send email alerts to you and/or your intended recipients when records are created or updated, or on a set schedule. This helps you automate various processes from notifying customers of their back-orders, to updating your sales representatives on their accounts.
- Using Formulas in Saved Searches
You can use formulas and SQL statements to include calculated values in your Saved Searches, making them an even more powerful tool. Some of the things you can do with them includes embedding links in your search results, display quantities of product that are awaiting fulfilment on partially-fulfilled orders, drawing attention to important information by colour-coding text with SQL CASE statements, and combining multiple field values in a single column to optimise the way your data is displayed.
- Exporting Your Search Results
Sometimes, you’ll need to export data in your NetSuite database for use in other applications, such as Excel spreadsheets. NetSuite gives you the option to export your Saved Search results in CSV, Excel, PDF or Tableau Workbook formats.
4. Use Colour Schemes To Differentiate Your Sandbox Environment
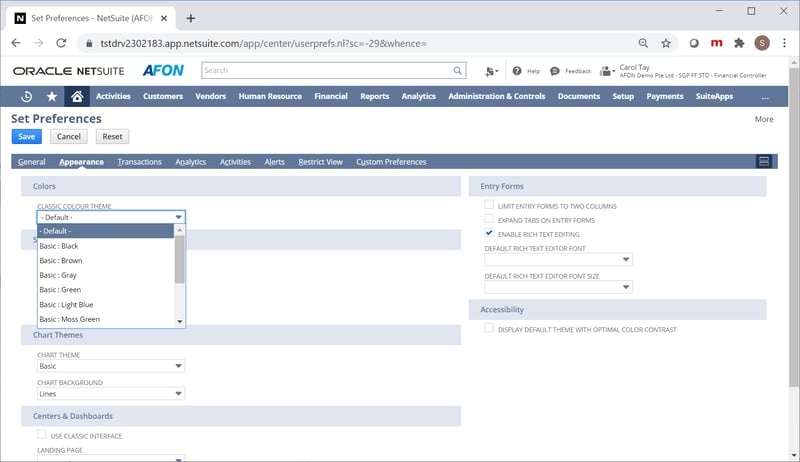
Colour code to distinguish your live environment from your sandboxes.
You may find that having a test environment for any business applications can be useful, especially if you’re careful about testing new updates to ensure it doesn’t break any processes in your operations prior to rolling it out across your organisation.
In NetSuite’s case, these test environments are called Sandboxes, and these are exact copies of your business’s production database stored on a separate server. They allow you to test any changes you’re planning to make in a controlled environment before carrying them over into your live instance of NetSuite.
While your Sandbox environment has an orange “SANDBOX” indicator on the top left corner of your NetSuite interface, it can still be easily overlooked. That can prove to be an issue, as you may end up mistaking your live environment for your Sandbox one and end up making changes before they’ve been tested, and thus cause issues for your business processes.
To prevent this from happening, you can change the colour scheme in your NetSuite interface to help you distinguish your live environment from your Sandbox. This provides an even more noticeable visual differentiation than the “SANDBOX” indicator, ensuring you won’t mistake one for the other.
To change the colour scheme in NetSuite, select the house (“home”) icon on your dashboard, and navigate to “Set Preferences”. From there, go to the Appearance tab to change the colour scheme of your NetSuite interface.
Getting The Most Out Of Oracle NetSuite
As the #1 true Cloud ERP software in Singapore, Oracle NetSuite is the application of choice when it comes to integrating and optimising your business processes entirely on the Cloud.
The tips and tricks we’ve covered in this blog post will help you make the most of a business application as power and versatile as NetSuite.
Once you’ve mastered the use of these tips and tricks, you’ll be better equipped to explore even more of the features and functionalities that will make managing your business more intuitive than ever.
This will stand you in good stead, as the scheduled release of two new updates every year from Oracle makes NetSuite an increasingly powerful and versatile business tool to wield over time.
And now that you've learned how to use Oracle NetSuite in your day-to-day work to best effect, find out the full extent of the value it can provide your business by clicking on the banner below.


